3 Effective Tips to Make the Most Out of Your iThenticate Similarity Report


This guest post is drafted by an expert from iThenticate, a plagiarism checker trusted by the world’s top researchers, publishers, and scholars.
For professional academics, getting their research published is crucial. Researchers need to regularly publish in order to secure full-time and tenure track positions at institutions, earn tenure once at an institution, and win grants and other funding for research projects. The importance of publication puts scholars under a tremendous amount of pressure, which can lead to cutting corners.
One of the frequently overlooked details is the improper citation of sources that might lead to plagiarism accusations. These accusations of plagiarism can quickly derail a scholar’s career, even when the plagiarism happened unknowingly or if the writer recycled his or her own works without clearly indicating the pre-existing source. Thankfully, scholars today have many tools readily available such as iThenticate, which when used in combination with other Enago services can give scholars an advantage in their academic careers.
In the years since its launch, iThenticate has become a favorite of scholars to check for plagiarism against more than 170 million articles and more than 91 billion current and archived web pages in its database. The iThenticate plagiarism check software is trusted by thousands of government, medical, and academic institutions around the world, demonstrating its wide appeal and effectiveness.
However, as effective as iThenticate is, you can make your experience with it even more efficient by practicing a few simple tips. Knowing how to adjust iThenticate to your needs and interpret its Similarity Report will keep your work free from the risk of plagiarism and maximize your potential to get published.
What is the Similarity Report?
The Similarity Report is the most important part of the iThenticate solution because it highlights what percentage of your document is similar to other, published documents. Once the software runs a similarity check, though, that’s only the start of the process. Submissions with similar content to one or more sources will be flagged for review. However, it’s important to point out that the similarity score alone will not determine if a particular document is original or not.
It can’t be stressed enough that there’s no set similarity percentage allowed by iThenticate in the Similarity Report. Each researcher and publisher decides what the acceptable similarity percentage per submission would be, so scholars need to know how to read the iThenticate similarity report in order to parse the information that is most relevant to their work. There could be many valid reasons for similar text to appear in your submission, such as common phrasing, so being able to exclude matches to focus only on the most critical ones for review is essential.
Now let’s walk through how to read an iThenticate Similarity Report. iThenticate generally, is very user friendly, which is good news especially for those who may be a little tech challenged.
When you submit a document to iThenticate, you’ll open the Similarity Report to the Document Viewer mode, which is separated into three sections on the screen. The document information bar at the top of the screen shows important details about the paper, such as word count and number of matching sources from selected databases. The document text, which is the submitted document, is on the left panel of the screen. It shows the complete formatted text, with parts of the text that match other documents highlighted in a different color for each similar document.
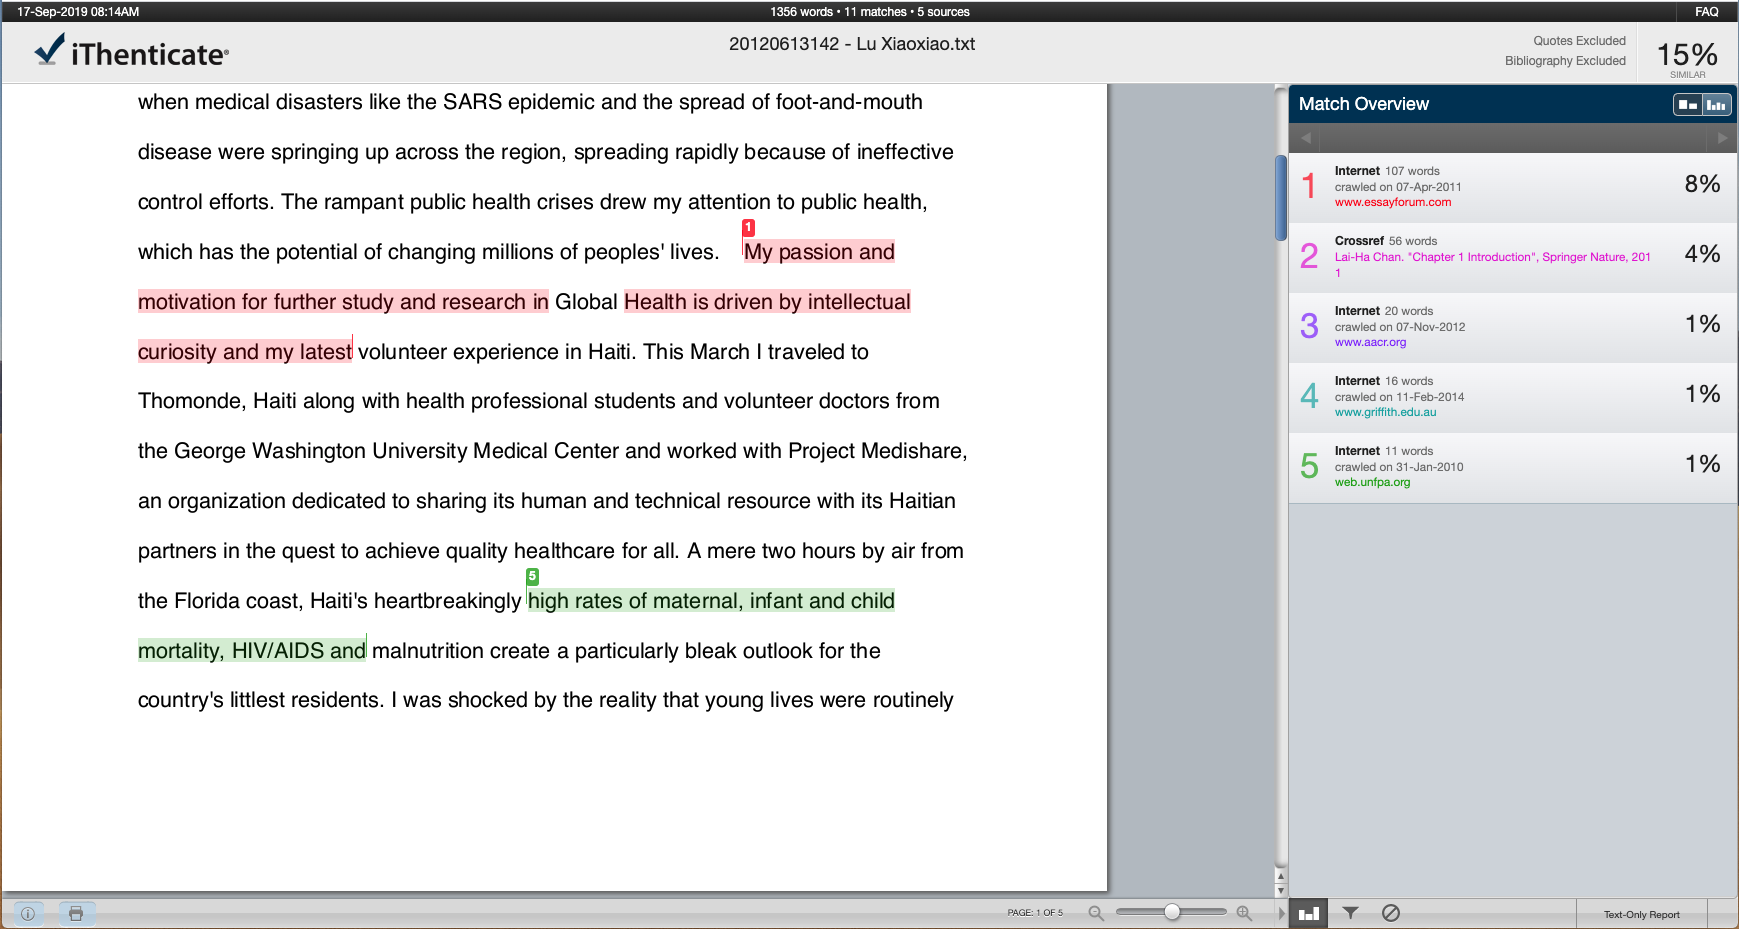
The match overview is located on the right panel of the screen. This panel shows the original sources that matched the submitted text and the percentage of the text match by each specific source. So, for instance, the top entry on the match overview may be a page or pages from the website Wikipedia, showing 17%, which means that the submitted text has a 17% similarity with the Wikipedia pages. The original sources are usually listed in descending order of highest similarity to lowest, but that is contingent upon the type of report being used.
Using the Right Report Mode
As you use the Similarity Report, you’ll notice that there are four separate modes, each with separate functions to aid you in your quest to determine the similarity of a document. Match Overview is the default mode and the one you’ll probably use the most, so let’s start with it.
When viewing the Match Overview, all top matches of the submitted text are color-coded and listed in descending order on a panel to the right of the screen. Keep in mind that only top matches are shown, so you’ll have to switch to All Sources for any underlying text match.
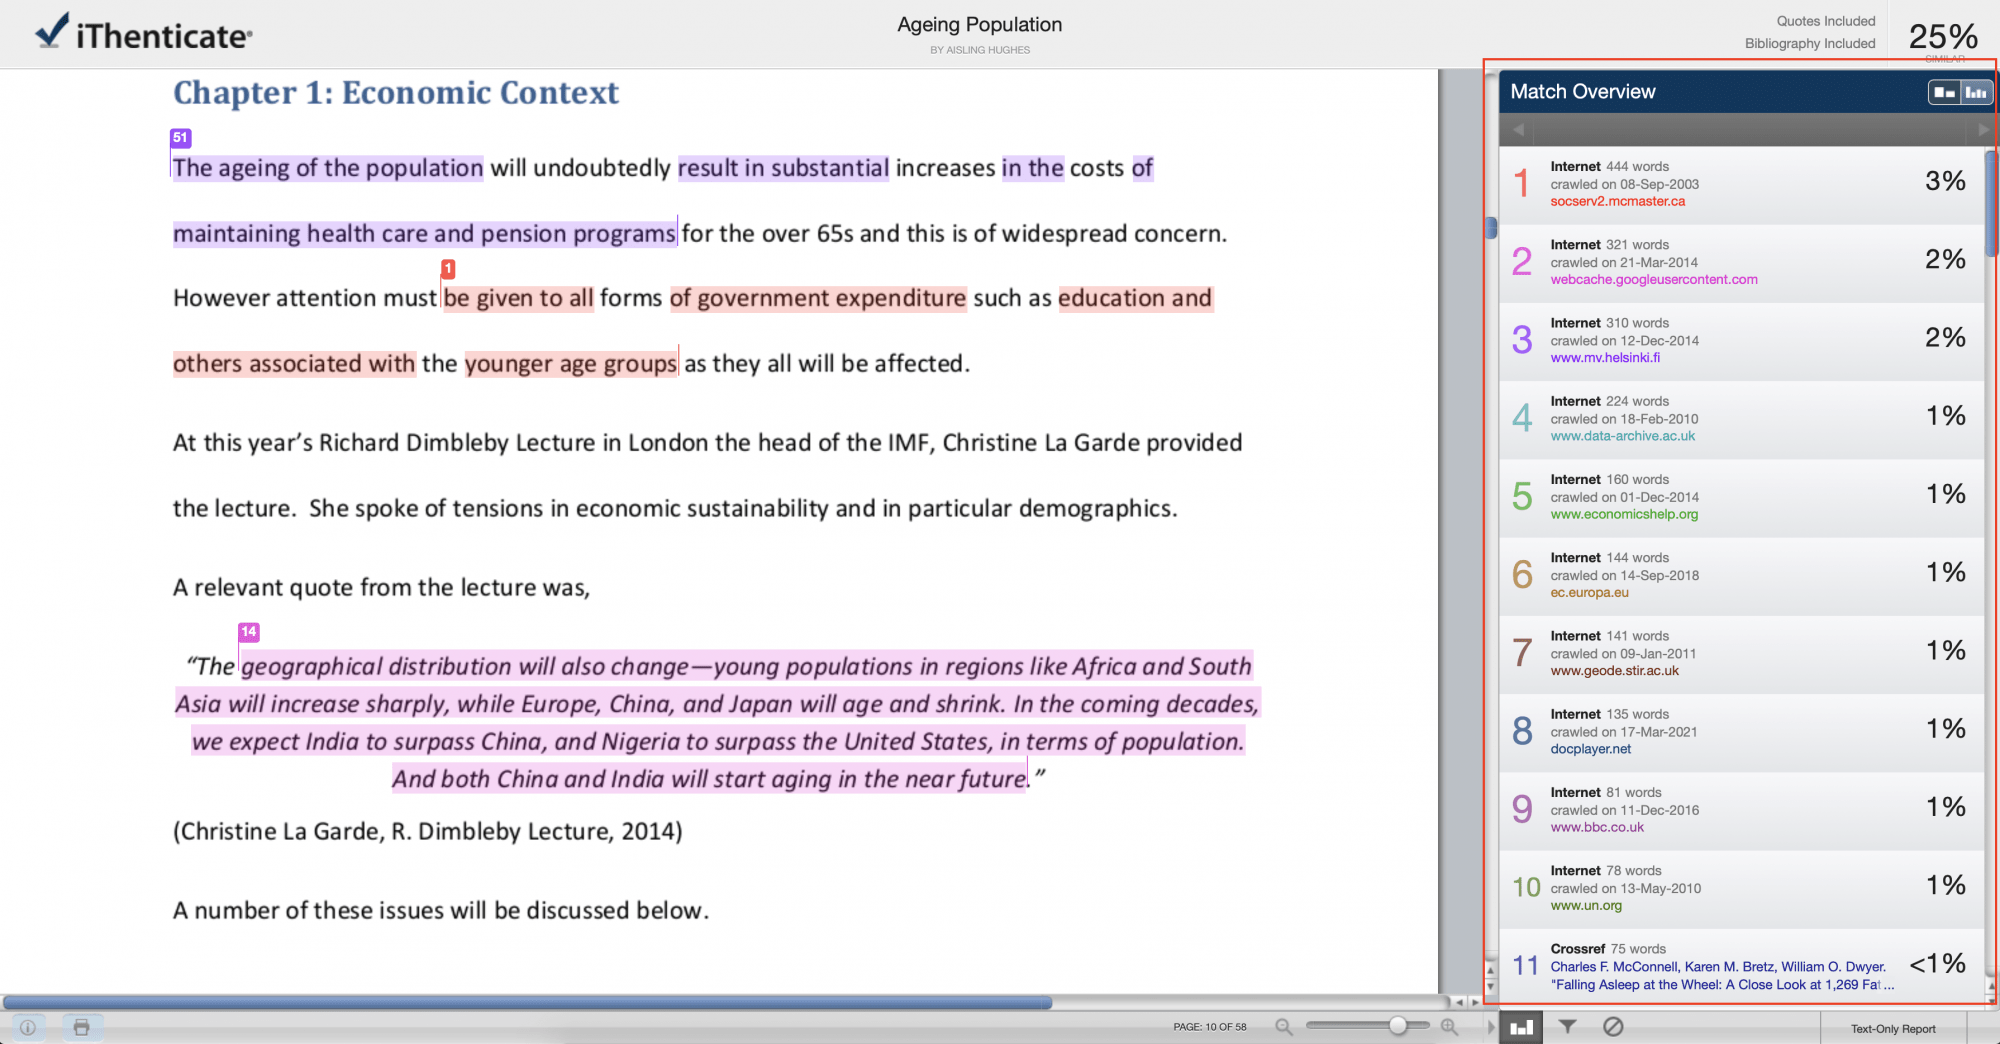
You can go into All Sources by toggling the view mode icon on the upper right corner of the screen. All Sources provides a more exhaustive list of similarity matches, which can be useful if you need to see a more detailed report. Some similarity matches are obscured in the Match Overview because they are included within better matches, so in All Sources you have the ability to see all these sources.
The next one, as the name implies, the Match Breakdown mode is a more detailed report that allows you to view smaller instances of similarity within a larger match.
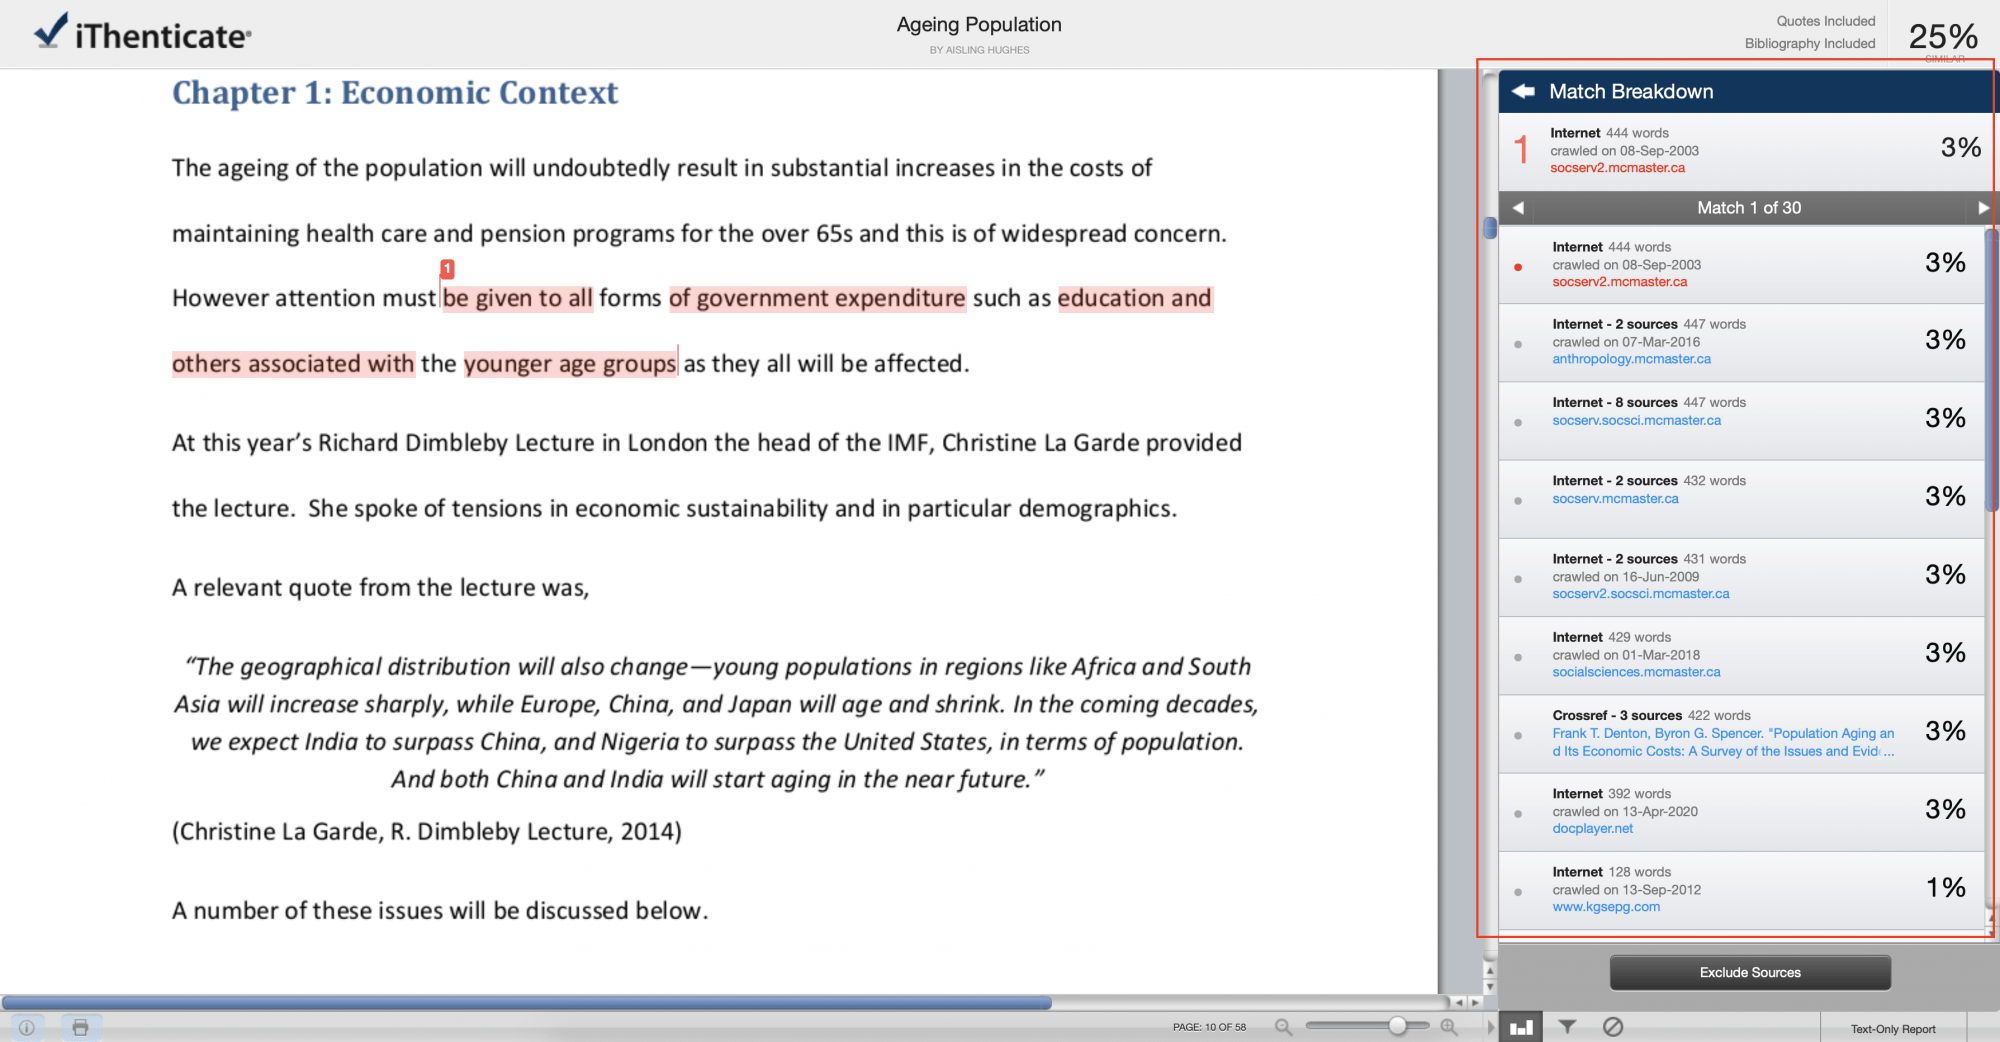
To enter this mode, in the Match Overview mode select the arrow icon next to the Match Breakdown. The underlying similar sources will then appear in a drop-down list below the top source match. You can then go back into the Match Overview mode by clicking on the arrow.
The Side by Side Comparison is the final but the most versatile of the four report modes. This mode allows you to compare the submitted text with the original, similar sources from the repository the way they were written. You can go into this mode from All Sources by selecting a source with the cursor. A text box will appear that shows the similar text from the original source, a few extra sentences for context, and the name of the original source.
You can access this mode from the Match Overview by selecting the colored number at the start of each sentence in the submitted text that is similar to texts from the database. The text box will then appear showing similar text from the original source.
Now that you know the basics of reading a Similarity Report, let’s take a look at some more in-depth tactics you can use to bring your usage of iThenticate to the next level.
Using Filters
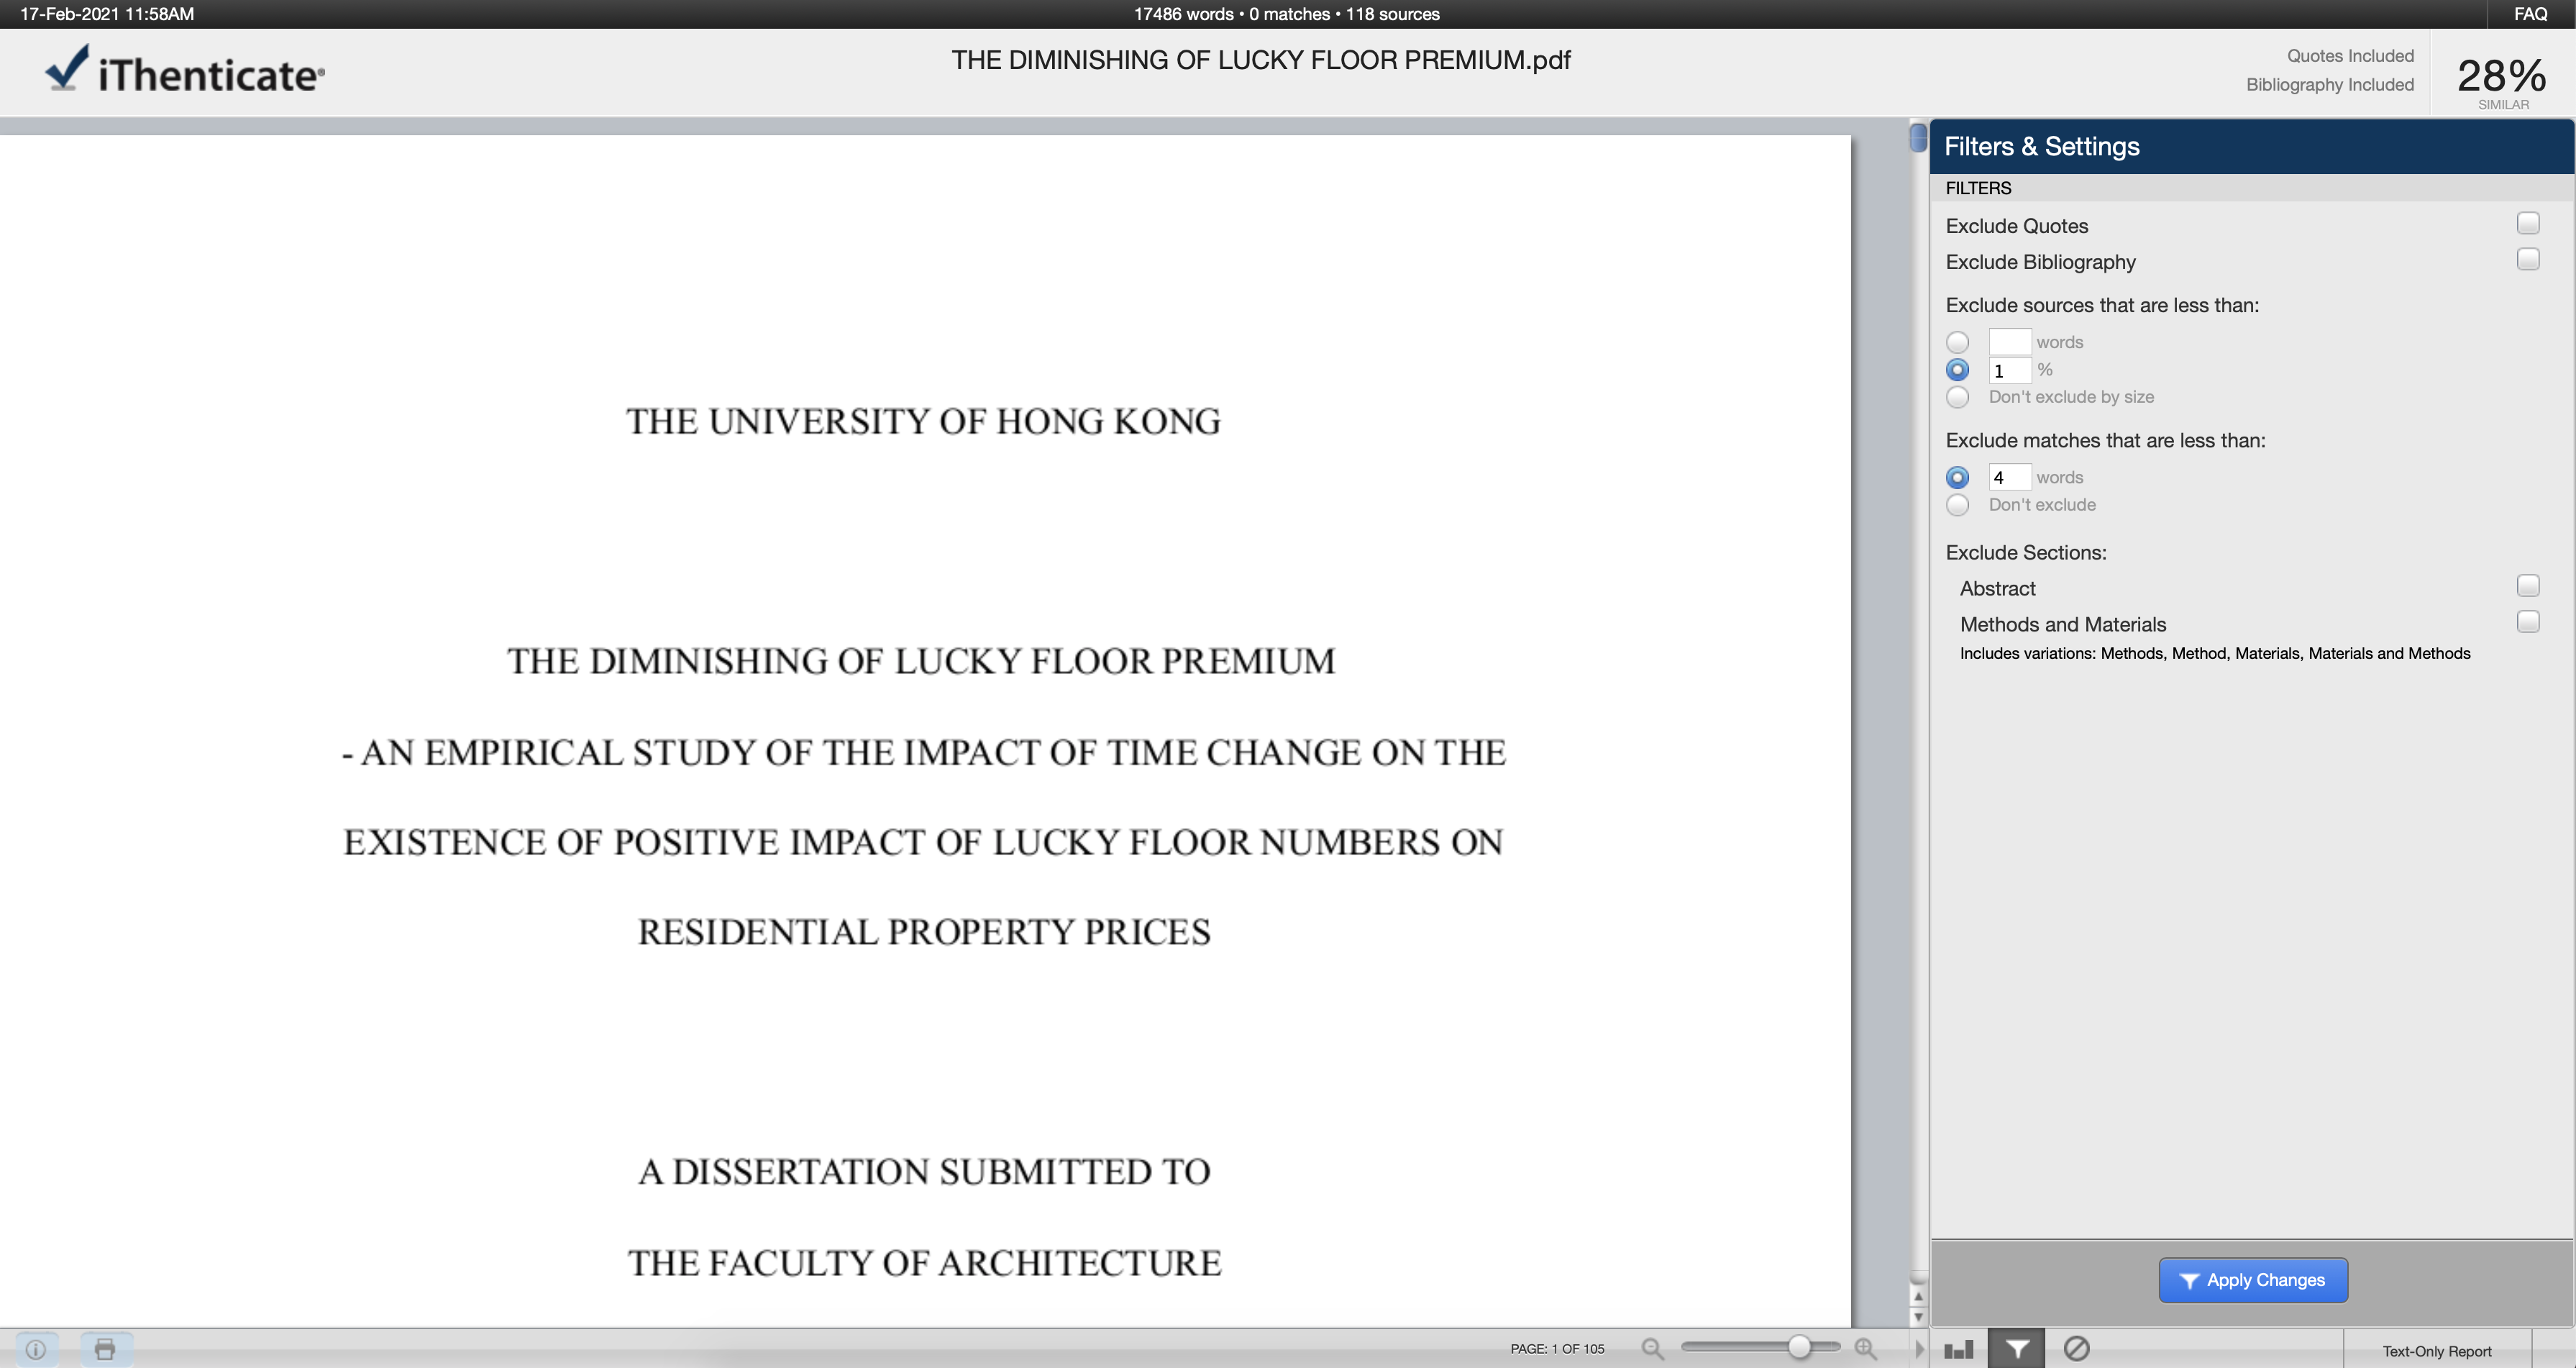
If you regularly view Similarity Reports, you’ll soon find that using the filters will increase your efficiency. To use the filters, select the funnel icon on the bottom left of the Document Viewer sidebar. You will then be given a variety of options to exclude from the Similarity Report, including sources in quotes and those in bibliographies. You can also exclude “small sources” and “small matches” by setting a minimum percentage or number of words that must match to be included in the Similarity Report.
To check the exclusions you made, click on the excluded sources at the bottom of the sidebar. If you want to restore excluded sources, toggle through each source and click the “Restore” button for each source to be restored, or you can click the “Restore All” button to restore all previously excluded sources.
As important as the Similarity Report is generally, after reading this you can probably determine how useful the filters can be for your research. Bibliographies and directly quoted materials will show high levels of similarity in Similarity Reports, yet they are not necessarily examples of plagiarism or unethical writing/research. Ultimately, knowing how to properly use the filters will give you more power and flexibility.
Hidden Insights
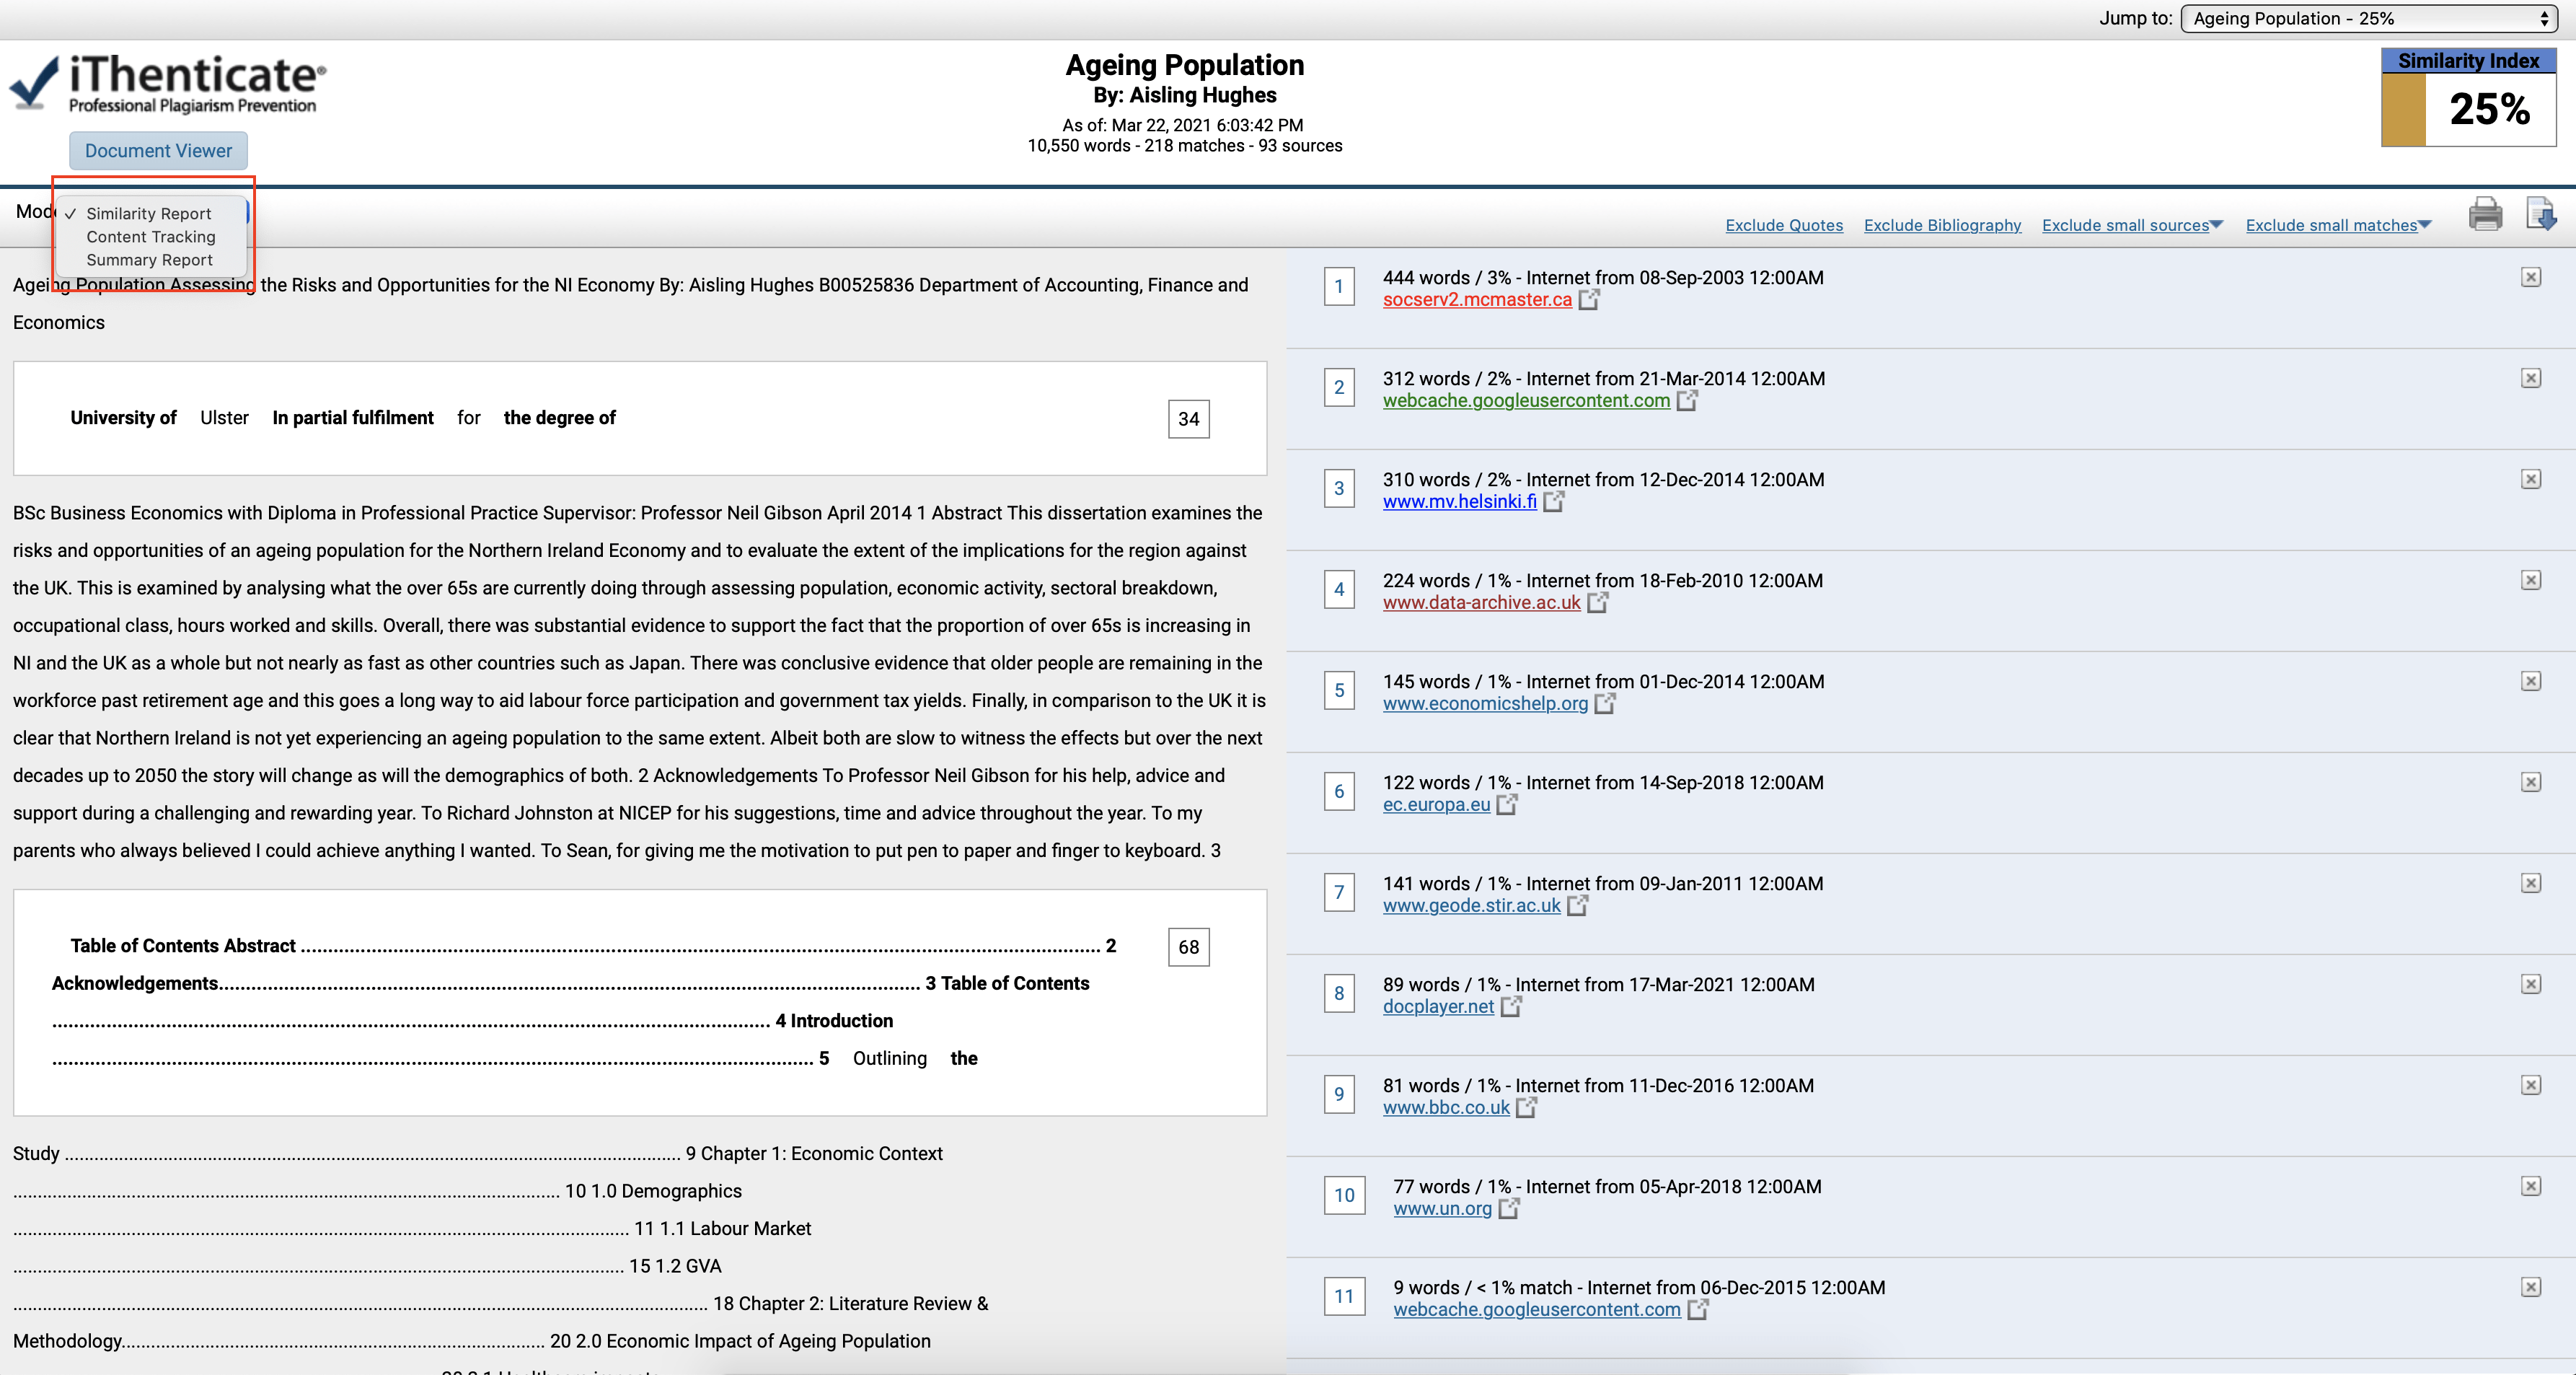
One final element of the Similarity Report that is important to know is the Text-Only Report. Enter the Text-Only Report by clicking on the bottom of the viewer. This is essentially a “no frills” view of the submitted document as it contains no document formatting. The information about the submission is displayed on the top of the screen, with the all-important similarity percentage index shown on the top right.
It’s important to know that in the Text-Only Report there are several modes you can utilize, which include: Similarity Report, Content Tracking, and the Summary Report. The Text-Only Report offers the same filters as the Document Viewer and it is easy to switch back to that mode by simply clicking on the “Document Viewer” button on the top left of the screen. The Text-Only Report is timesaving and offers you another perspective on the submission.
Takeaway
For any scholar attempting to land a position at a research institute, gain tenure at a university, or obtain grants for research, publication is vital. In order to get published, researchers should meticulously make sure their work is ethically sound and free of plagiarism.
The iThenticate plagiarism checking software available for Enago customers has proven to be an effective tool for scholars towards that goal. Knowing how to properly read an iThenticate Similarity Report, and how to utilize some of the more nuanced features, will help any scholar make that next step toward publishing with confidence.
Find out how you can use iThenticate plagiarism checker software by contacting the Enago team. You can also check out our previous article in this series on plagiarism with iThenticate.